The bottom line: 99% of home WiFi issues can be fixed by unplugging the router, waiting five seconds, then plugging it back in. This resets the device and frequently improves the speed.
Our aim with this guide is to provide you a to-the-point reference for dealing with some of the most common home WiFi issues, including:
- WiFi not working
- WiFi slowed down
- WiFi network disappearing
- Devices that won’t connect to Wifi
We’ll cover what to do if your connection is running slower than usual, as well as how to troubleshoot a network that won’t connect at all. We’ll also take a look at several tools you can use to help troubleshoot your connection when problems crop up.
Home WiFi Quick Fix
If your wireless connection suddenly stops working, before trying anything else, restart your router. Here’s the process:
- Unplug or power off your router.
- Wait 2-5 minutes before plugging it back in.
- Wait 5 more minutes and retry the connection.
In most cases, this should fix your issue and allow you to get back online. If you go through these steps and something still isn’t working, you may need to contact your internet service provider for assistance.
Understanding Your Router’s Icons
Most routers have a series of icons that illuminate to convey different status messages at a glance. Though these can vary from brand to brand, most manufacturer’s include at least three primary status indicators:
- Globe icon: solid when modem is connected to the Internet.
- WiFi icon: solid when WiFi is being broadcast with no issues. status
- Ethernet icon: solid when ethernet cables are connected and working properly.
When everything is working properly, you can expect the icons to be solid or blinking green or blue light. This signals that a device is plugged in and functioning normally.
When there is a connection issue, you can expect the icons to turn red or orange.
An orange or amber light may indicate a problem or limited connectivity, whereas a red or unlit icon may signal that there is no current connection.
Important point: in order to be clear on what your specific device is communicating to you, be sure to refer to the user manual for a more detailed explanation.
Pro tip: You can usually find a digital copy of your router’s manual by typing your device model number followed by “user manual” into Google.
How to troubleshoot WiFi

If you’ve tried the quick fix above to no success, there are still several other ways you may be able to troubleshoot your WiFi connection. In order to identify the technique most likely to actually help you, let’s break them down by their core issue:
“I’m experiencing slower-than-normal network speeds.”
Try this: Plug an ethernet cable directly into your router and test your internet speeds using our speed test tool. Next, test your speeds on the WiFi connection. If they are both slow, the issue is likely with your service provider, and not your equipment. Give them a call.
If the hardwired connection is much faster than the wireless one, however, there may be more you can do to optimize your network. Wired connections will usually always be faster than wireless in some capacity, but the difference shouldn’t be so vast that your WiFi is unusable. First try moving your router to a more central location. If that’s not an option, it may be worth exploring how to extend your Wifi connection to all areas of your home.
Also, you may be encountering interference from networks adjacent to yours. If you think this may be the case, you can try changing the channel your router is broadcasting on. For starters, you’ll want to use the 5Ghz band whenever possible, if your router supports it. These tend to be less congested, and therefore better performing than their 2.4GHz counterparts.
“I have no internet connection at all.“
Try this: Plug an ethernet cable into your router and see if you’re able to get a signal on a desktop or laptop. If you can’t, your access has been cut, and you should contact your ISP.
If you find that you’re able to load web pages through a hardwired connection, there’s definitely something wrong with your WiFi network itself. If restarting the router didn’t fix the issue, you may need to set it up again completely. Most routers have a small “reset” button that needs to be held down with a paperclip or other small object. Doing this will restore the device to factory settings, and you’ll be able to go through the first-time setup once again.
If you’ve been through this process and still can’t get connected, you’ll likely need to contact your ISP for help. You could have an unpaid balance that has caused the company to suspend your account, or there may simply be an outage in your area.
“My WiFi network disappeared completely.”
Try this: Check to see where your router is positioned. If it is somewhere cramped, such as behind a couch, or crammed into a crowded equipment cabinet, it may be overheating and shutting down automatically to prevent any damage.
If you’re able to move your router somewhere where it has more airflow, you should be able to solve the overheating issue.
If you feel that your router is positioned somewhere ideal and that overheating isn’t the problem, there are a few other things that could be happening.
For one, your network may have reset itself due to an update. Take a look at the default network name (usually printed somewhere on the router itself) and see if you recognize that network when looking for a connection.
“My phone/laptop/tablet won’t connect, even though my other devices are fine.”
Try this: Turn off the offending device and turn it back on. You can also try turning the WiFi off and on again in the settings of your device, just to be thorough.
If this doesn't help, you may need to delete your network from the device entirely. On an iOS or Android device, you can simply click on the network name and hit “Forget This Network.”
This will mean you’ll have to find the network again and put the password in like you did the first time you set it up, but it should solve any remaining connection issues in the process.
Tools for WiFi troubleshooting
Speed Test
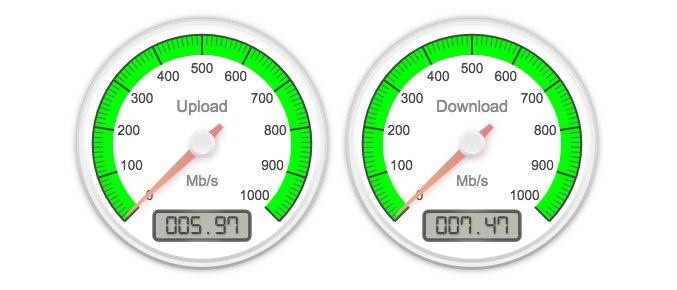
Our speed test tool will allow you to see how your current network is performing in terms of both upload and download speeds. You can use this at any time to test the quality of your connection, and if you’re having any issues, you can use it to gauge your progress on getting them resolved. You can also use Speed Test periodically to see if you are really getting the speeds that you are paying for. Just remember that using WiFi will always slow things down a little bit!
Wireless Diagnostics (Mac)
The Network Diagnostics tool is a robust program that allows you to get a clear picture of your network health, as well as troubleshoot any issues you may be experiencing. You can find this program by hitting Command + Spacebar and typing “Wireless Diagnostics” into the search bar.
When you first open the program, it will scan your immediate area for any available WiFi networks. Once this is done, you’ll be presented with two options: Monitor my WiFi connection and Continue to summary. Choose neither of these. Instead, at the top of your screen, select “Scan” from the Window drop-down menu. You will see a list of networks. Select “Scan Now.”
The service will then show you a full list of connections around you, including what channel they are operating on. In addition, the program will show you the best channels for both the 2.4GHz and 5GHz bands based on network congestion. In order to actually change the channels your router is operating on, you’ll need to google the brand of the device followed by “IP address.” You will then type this in just like you would any regular website (detailed instructions below).
- Open the program by clicking Command + Spacebar and typing “Wireless Diagnostics”
- Once open, select “Scan” from the Window drop-down menu.
Select “Scan Now.”
- Observe the channel your network is operating on, as well as the channels recommended by the program.
- Log in to your router’s control panel and change the broadcast channel to the one recommended above.